Saturday, October 30, 2010

A little Break


NOT YET!!!!

We are heading over the pass for a little break.
Probably no opportunity to write posts,
and have not figured out the 'do it ahead' thing.
(no time to do ahead anyway).

So here are some snowmen I painted.
Hope they will get you into the seasonal mood.

(click on pic to see the hinges I use on my art.)
On left side of board you will see hinges.
This is just one board, made to look like
it is two boards hinged together.
Pretty cool huh??

Til we return.

blessings

barbara jean


Friday, October 29, 2010

Signs For Funky Junk Night


I love the word Remember.
There are just so many things we should remember.
Like how much we are loved, and cared for by our Lord.
That His mercies are new every morning.
That He fills us with His love and Spirit.
That life is a gift from Him.


That nothing comes into our lives that He does
not give us His grace and strength to get through.

That we should Love others as He loves us.
And remember to laugh, and Dream.

and
We serve an awesome God!!

His blessings on your day.

barbara jean

I'm joining Donna at
Funky Junk Interiors
Sign Party.
Thanks for hosting Donna!!
Funky Junk's Saturday Nite Special


fun friday finds


any one love clocks?
What do you think of these?
Old one on left works, but cord is frayed.
Will probably replace it.

Gold one on right:
not into gold.
spray paint white? or black?
It will probably go into the new French/Victorian room coming soon.

And how do you like my newest little table?
It has a glass top.
It will be black and go into the new room.
I think! =)

blessings on your day

barbara jean

Thursday, October 28, 2010

Lace Flower Tutorial Follow Up

I posted a Lace Flower Tutorial earlier this week. Go HERE

today I'm sharing some ways to finish your Flowers, and some ideas from the comments.


ways to use and finish your flowers:
sew pin back to back of flower.
can be used as a pin, or attach to your bag, or hat.
No, it's not a cool purse, but you get the idea!
Another option: glue on pin back, then put bobby pin through it,
can be used as a hair clip or pin.

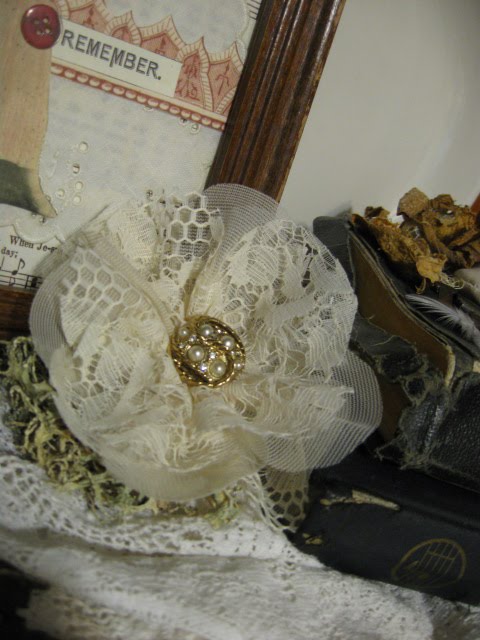
(what do you think of the darker pin for the flower center?)

another idea:
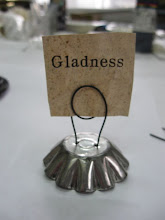
sew a ribbon or seam binding on back for tying to a tree or package.
And other ideas?

And look at these great ideas from my visitors:
Delete
Blogger The English Romantic said...
I'll be making some of these for my tree, thank you for the tutorial, you make it look easy.
I have loads of samples of Italian lace curtains now I am off to cut them up!! Angela.
Thanks Angela! Great idea! I have tons of old curtains, too!
Delete
Deletesweet violets said...
Great idea...gonna give it a try.....instead of burning the edges of the fabric, try cutting it with decorative scissors for paper crafts....and then use ink from the ink pads and stain the edges.....I like to use the sepia ink. happy crafting, cleo...
Thanks Cleo. Great idea for finishing edges. I knew mine needed a little 'something'.

So here is what I did:
After I cut my flower out, but before unfolding,
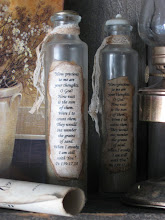
I dipped them in a bowl with instant tea in it.
(Just pretend there is tea. I forgot to take pic.) =)
New way: make flower, then before adding center, dip whole flower in tea mix. 
Set them on plastic to dry. Right side up, and upside down do two different things.Play with it and you will see. =)

I held onto the straight end, and dipped the rounded end in the tea.
I let it soak up a bit, then shook it out in the sink and laid it to dry.
This is what they looked like when dry.
Then I went ahead and did my flower as usual.

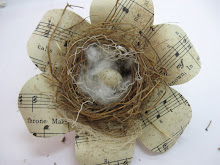
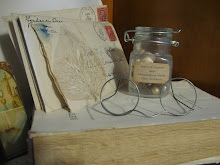
Here is a pic of the two different kinds. The stained one is on the left.
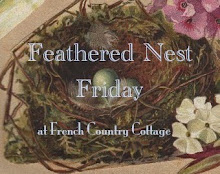
and this is a pic of some of the ones I did on vacation.


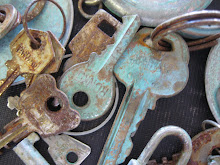
Since I'm doing bunches of these for the shop, and gathering for a class,
I am off to find more nice pins or buttons for centers.
Anyone know where I can get some, cheap??

Amazing how you cannot have enough of something that you did not know what you were going to do with when you got it!

Thanks for coming by.

Blessings

Barbara jean


Wednesday, October 27, 2010

Lace Flower Tutorial


Remember this BIG spool of lace I got awhile back??
$5.00!!!!
Yards, and yards, and yards of lace,
with a light weight fabric lining between layers.

I decided to make some flowers out of it for the tree at the shop.
(yes, I have had to start thinking Christmas!)
I've seen tutorials where you cut 32 petals to make a flower,
or ones that had 4 shaped petals but still had to be cut out
each individually.
I just had to think of something quicker for me.
So, here is what I came up with.

supplies for one flower:

approx 30" lace or fabric & 30" netting, tulle etc.
You will need two layers of the lace,
and two layers of the netting.
scissors needle & thread jewelry or button

measurement for each layer is 15x 2 1/2"
4 layers total

picture 1

Fold 15" piece into 5ths.
(approx 2 1/2" long)
See above picture.
2
cut a rounded shape across the top.
(leave about 1" not cut at each side).
The strip will look like the one in picture
with the 'scallops'.

(finished cut piece)
3

Gather straight edge of fabric with double thread on needle.
(I did about 1/4" running stitches,
about 1/4" from bottom).
This does not have to at all perfect!
Which is perfect for me! =)
4

Pull tight.
Kind of 'fan' it out evenly.
Then do a few stitches across both ways to secure it.

This picture is a layer of lace
and a layer of netting. 2 layers.
You will need 4 layers altogether.
Stack the 4 layers on top of each other.
You can alternate lace and netting,
or put two netting in middle.
Just play with it.
Sew through all 4 layers.
(you can also add a 5th layer.
5 layers would take 45" of both fabrics)

Add a piece of jewelry or a button in the middle,
and "fluff".

Here is one finished
with a vintage earring in the middle.

Here is one,out of a silky material. (not finished)
I tried burning the edges of this one,
but I did not like how it turned out black.
Might work well on darker colors.
Or, maybe I just did not do it right)
And here is what my sweet bicycle riding husband
thought would make a great center. =)

Light off....
Light on.
What do you think??
Back to cuteness:
A little vignette I added the flower to.
(the sweet little collage on the left
was a gift from my friend Karen at

A brand new blogger, and really sweet gal.
close up
finished silky flower.

Thanks for coming by.
I'm linking up to the parties below.
Please go visit and and thank our wonderful hostesses.

Blessings

barbara jean

Go HERE for updates

giveaways

Beyond The Picket Fence

Photobucket